Chapter 3-6: Input Processes |
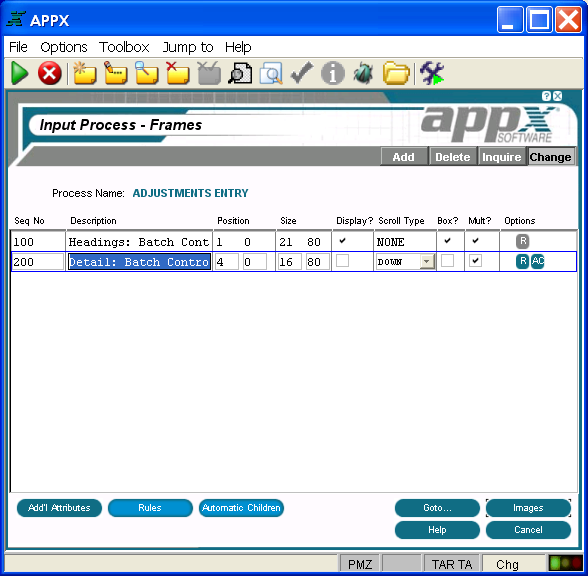
Input Frame Specifications When you select the frames option (or press return) on the Input Processes screen, after completing specifications for an input process, the Input Process Frames screen is displayed as shown in below. Input frame specifications define attributes that govern both the visual presentation of a frame and the way it executes.
Input Process Frames Screen The Input Process Frames screen contains the following fields: Seq Nodisplays a sequence number that is defaulted by APPX and used to identify this input frame. The default sequence number can be overridden, but must be unique within the process. Sequence numbers determine the order of the frames in the process structure. The first frame that is defined in add mode is assigned sequence number 100, and additional frames are assigned a number equal to the highest existing sequence number, plus 100. Description identifies this input frame. The description is for documentation purposes only. Position fields determine the placement of the rows and columns of a frame relative to the rows and columns on the screen display. Row entries designate positioning relative to the top of the screen (or bottom if negative). Column entries designate positioning relative to the left of the screen. The default is 1, 1. See Frame/Image Positioning for more information. Size fields, which consist of three numeric characters, designate the number of rows and columns that comprise the displayed frame. This size may be greater than the size of the screen if panning capabilities are desired. The default is 21, 80.
Display?,represented by 'yes' Scroll Type indicates whether or not the images on the frame scroll and, if so, the type of scrolling to be performed as described below. The default is NONE. See The Effect of Scrolling Frames on Screen and Page Positioning for a detailed discussion of scrolling frames. NONE. The image on the frame does not scroll. DOWN. APPX divides the frame into a grid of equal-sized regions based upon a calculated composite image size. The first image is placed into the upper left region in the frame. Succeeding images are placed in the region below the previous image until the column is complete. As each column is completed, the next image is placed at the top of the column immediately to the right of the completed column. ACROSS. APPX divides the frame into a grid of equal-sized regions based upon a calculated composite image size. The first image is placed into the upper left region in the frame. Succeeding images are placed in the region to the right of the previous image until the row is complete. As each row is completed, the next image is placed in the far left-hand position of the row immediately below the completed row. COLUMNAR. APPX divides the frame into columns based on the widest alternate image. The first image is placed into the upper left region in the frame. Succeeding images are placed immediately below the previous image until the column is complete. The column is considered complete if the next image cannot display in its entirety within the space available in the column. As each column is completed, the next image is placed at the top of the column immediately to the right of the completed column.
Box?, represented by 'yes' Mult? indicates whether multiple images can be defined and edited for this frame. Multiple images are used to present data entry images with different fields to users. For example, in an Employee input process, you may want to present one data entry image if the employee is a salaried employee and a different image if the employee is a paid an hourly wage.
Options are indicators that are present whenever the options they denote have been defined. Options applicable to this screen are Buttons are provided at the bottom of each Input Process Frames screen for accessing the following options: Additional Attributes - See the Input Frame Additional Attributes Option for details. Rules - See the Input Frame Rules Option for details. Automatic Children - See the Input Frame Automatic Children Option for details. Goto... - Allows you to identify and retrieve another record by optionally entering a full or partial key. Images - See Input Image Specifications for details. This is the default option. Help - Allows you to view online help text for a selected item. Close or Cancel - In Inquire mode, Close allows you to end the current process. Otherwise, Cancel allows you to end the current process without saving changes, if any, to the current record. In addition, the menu bar provides the following pulldown menus: Toolbox - See the Input Frame Toolbox Pulldown Menu for details. Jump to - Same as the Process Jump to Pulldown Menu described in this manual. |
Application Design Manual "Powered by Appx Software"321 ©2006 By APPX Software, Inc. All Rights Reserved |
 or 'no'
  , indicates whether or not APPX stops and waits for the user to respond to the image. If 'yes' is selected, APPX does not stop, but goes on to the next image. If 'no' is selected, APPX stops on the image, even if no modifiable fields have been defined.